
Markup shows exactly what you mean. Circle the damage, point an arrow at the problem or add a short note right on the photo.
Open the markup editor
- Open a job and click a photo.
- Click Mark up under the photo.

The viewer also lets you Share the photo, Set cover to use it as the job's cover photo, Download it or Delete it.
Use the markup tools
- Draw. Freehand drawing.
- Poly Line. Connected straight lines.
- Arrow. Point at something.
- Circle and Square. Outline an area.
- Text. Add a short label.
- Timestamp. Add a date and time stamp.
Pick a color with the color dot and a line width with the buttons on the right. Use undo, redo and the trash icon at the top right to fix mistakes.
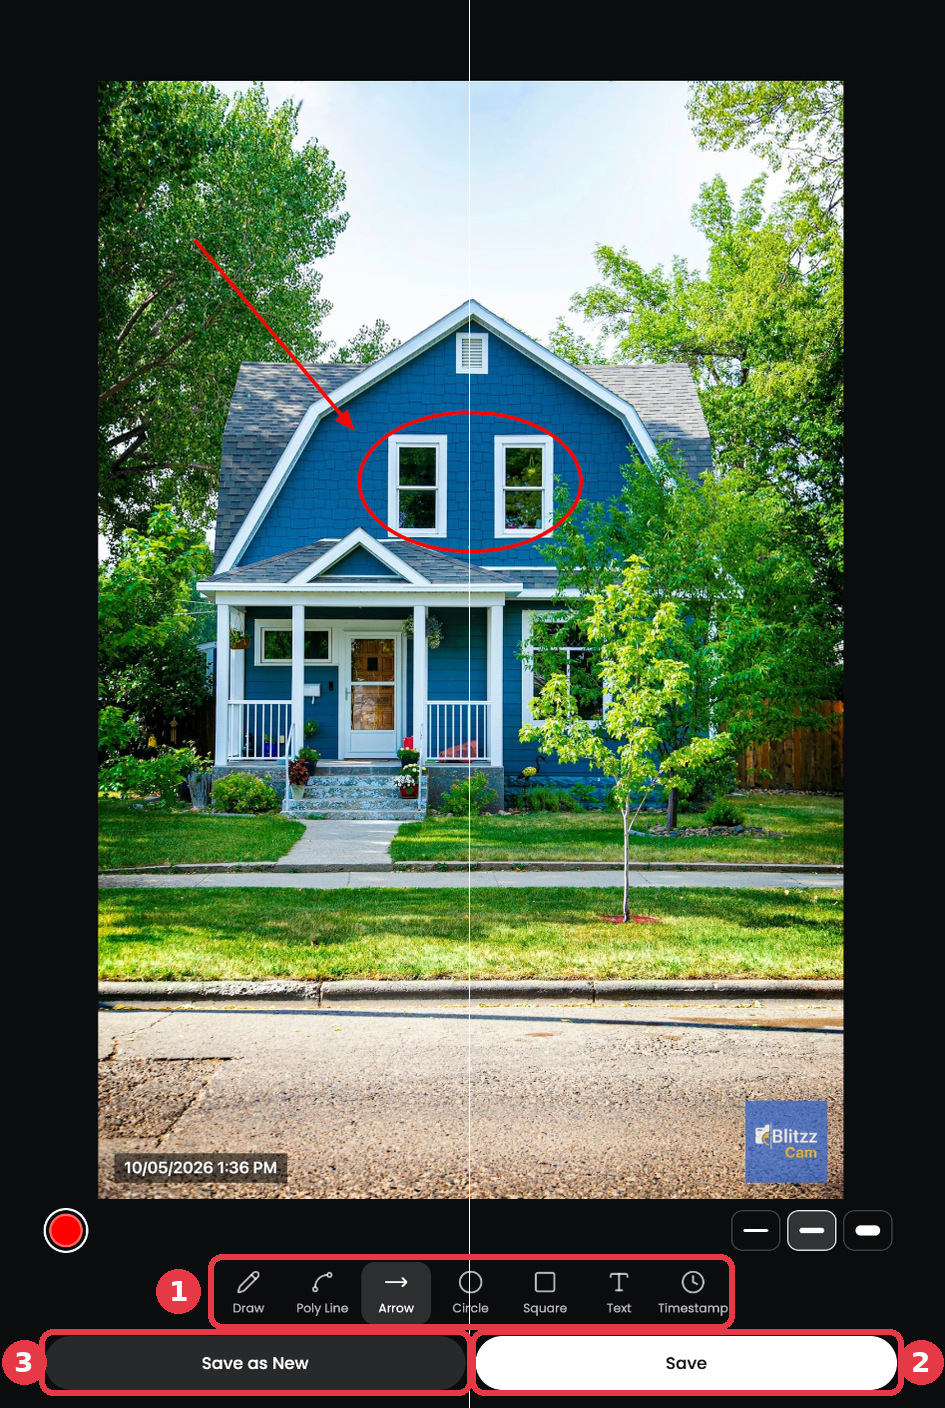
Save your markup
- Save updates the photo with your markup.
- Save as New keeps the original and adds a marked up copy to the job.
- Cancel closes the editor without saving.
Tip: Use Save as New when you need the original photo for your records.